Home guitar studios were something that was just a pipe dream for most guitarists 15 or 20 years ago, but nowadays, a home studio can be achieved without spending a fortune and by doing everything yourself. For many musicians, the idea of a studio within their own home is one of the most exciting prospects there is, and the ability is there to be able to make a quick recording of an idea, or hunker down for weeks and make an album.
In this guide, we’re looking at how to build a home guitar studio.
Building a Home Guitar Studio
The basics of building a home guitar studio don’t have to be overly complex. The idea is basically to create a space in your home which is specifically for recording guitar. This will normally be its own room, but the room can be used for other things, too. This can be a spare bedroom or even an outbuilding. Within this room, you need to treat the space acoustically with diffusers and acoustic treatments to ensure it is a suitable space for making recordings that don’t sound like they were made in an aircraft hangar. Once you’ve done this, a few basic pieces of equipment such as a desk or audio interface, some microphones, and speakers/headphones can be the basis of your studio. In this article, we go into more detail about how to choose and treat the space as well as what equipment you will need.
Benefits of a Home Guitar Studio
If you’ve thought about building a home studio for playing and recording guitar before, the chances are you’ve had a long think about the benefits! In case you’ve not thought of any (or just because they’re fun to think about) here are some of the benefits to building your own home studio for guitar.
- Learn more about the way music is recorded and produced, and even become a more astute producer.
- Be able to quickly record and share ideas with people, no matter where they are in the world! You can mix down an idea and send it to someone the other side of the globe in minutes.
- Cut the costs of using studios and engineers. If you are recording yourself to a good standard, you won’t have to pay to use commercial studios.
- Be able to record on your own schedule. If you get back from a night out and it is 1am, you can still record if you are suddenly struck by inspiration. No waiting around for studio bookings or relying on others to record you.
- You can share your skills and record friends and bandmates in your home studio. If you hang out with a lot of musicians, you might suddenly find yourself very popular.
There are so many benefits to having a studio within your home. If you’ve decided you want to go ahead and create one, then it is time to work out how it is possible!
The Cost of a Home Studio
Without wanting to cop out and give the ‘how long is a piece of string?’ answer to this particular question, there really is no specific answer to how much a home studio for guitar costs. In the modern age, there is a lot of affordable equipment out there. If you want to do it on the cheap then you can still create something with the ability to make good recordings. In our article Best Guitar Recording Equipment For Beginners (Affordable Options), we’ve reviewed budget equipment which is good for beginners but can do a job in your studio, especially if you are building from scratch.
The truth is that music tech can be pricey, especially if you are fussy about brands and only want the very best. If you want a studio to rival the very best in the world then you can end up spending tens of thousands of dollars on equipment. However, creating professional recordings doesn’t always require this.
A Budget Studio
A cheap end studio could be created with under $500 in budget if you already have a computer or device to record onto. This will not be a studio capable of recording a lot of instruments at once, so if you only want to record guitar then this price range may be achievable.
Mid-Range Home Studios
A budget of $2500 can be a good starting point for a studio. This can include a computer to act as the focal point and center of your recording. This is enough for a small mixer, multiple microphones, audio interface and acoustic treatment to make sure that your studio isn’t just a very basic space to record, but that it can really produce results worthy of release. Within this, we haven’t included the guitar (or amplifier). If you need these, the costs may rack up more.
High-End Home Studios
This is where things can get fun! If you have the money to spend on this and are looking for a truly professional, state-of-the-art home setup then you can quickly spend $20,000 or even more. I want to stress once again that this is not essential! A top quality microphone can cost $1,000, a Mac Pro could cost you $5,000, and of course guitars and accessories aren’t cheap. Plus, let’s not forget about mixing desks, which can cost a huge amount, especially if you opt for a classic desk with a lot of inputs!
Before you decide how much to spend on your studio, think about what you need from the space. If you have the money and want to record a hit album, go ahead and kit out your home studio. If you are more restrained by budget, this doesn’t mean you can’t make some professional recordings without spending a fortune.
Choosing and Building the Perfect Space
This is likely to be restricted by your home, and the space you have available. In an ideal world, you will have a whole room to dedicate to making your home guitar studio, but it is understandable that not everyone is in a position to do so. You can definitely create a studio space in a room you use for other things, such as a room that doubles as a cinema room or even has a bed in and functions as a spare bedroom, but ideally, you should be able to prioritize the acoustics of the space.
Ideally, a spare room will be an excellent space for you to treat as a blank canvas. Alternatively, an office or study. If you’re really stuck for space then a garage or even a summer house could be the place for you to set up your home studio for guitar.
The Acoustics of Your Home Guitar Studio
Treating the acoustics should be top priority, especially if you are planning to make your recordings on a microphone rather than use a guitar interface. The acoustics will make your guitar sound clean and clear and allow you to hear whatever effects you put on without the room tainting the sound.
When it comes to recording, the plan audio engineers usually have is to get the recording as dry as possible, with no reverb or imprint of the room. Imagine a recording which takes place in a cathedral or even an echoey bathroom. Once this extra echo has been recorded on a guitar take it is impossible to get off. If you record dry, with no tainting of the room, even if you want to add this in later, you can use reverb effects. The clarity of the audio should be the top priority. For this, we want to make the room acoustically ‘dead’ or ‘flat’.
Acoustic Panels
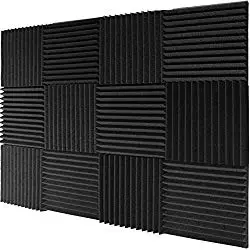
To do this, in an ideal world, acoustic panels should be installed. These don’t have to be expensive and often are made out of foam. They work by ‘soaking up’ the audio rather than reflecting it back to us.
Acoustic panels and treatments can do two different things:
- Deflect the sound so that it is going in different directions, rather than echoing straight back into the mic. Often, acoustic panels will be diffusers, sometimes made out of wood. They are designed to scatter the audio reflections in a load of different directions so they are not focussed and don’t just come straight back into the microphone or our ears.
- They can soak up the audio vibrations to stop them deflecting back. This works in a similar way to water, and this can be a helpful analogy. Pretty much anything that would theoretically soak up water can potentially contribute to an acoustically flat room.
As well as specific items which can treat the acoustics, such as panels, filling the room with materials can be a good way to try and keep noise reflection to a minimum. Sofas, chairs and lots of cushions can help. Have you ever been in a room which is being decorated and all the furniture has been taken out? You probably notice the fact that there is suddenly an echo.
Equipment Required
The equipment you need to build a home studio can vary depending on exactly how you wish to make your recordings. Think about the signal path and how you wish to record your instrument. You should also consider whether you are using an acoustic or electric guitar, or a combination of both.
Naturally, you will need your guitar as well as any form of amplification. From here, you can choose a few different ways to record.
- You can record using an audio interface, which can plug in either a ¼ inch jack directly from your guitar, or can connect to a microphone in order to record the sound.
- You can run a microphone or multiple mics into a mixing desk or large audio interface (this is great if you want to record multiple musicians at the same time).
- You can use a guitar interface, which will take signal straight from a ¼ inch jack cable and process and amplify to a level which you can then record on a computer.
These different techniques will require slightly different equipment setups, too. There are some options which can allow you to record onto devices such as phones and tablets and we talked about those in our articles How To Record Electric Guitar and How To Record Acoustic Guitar.
For a home studio however, we recommend recording onto a computer as they tend to have a much higher hard drive space and just give a lot more options for exactly what you can do with the sound.
The equipment needed to build your home studio is listed below.
Computer
You’d probably like to think that you’re the brains of your studio, but it’s probably your computer! Either a laptop or desktop is fine, just make sure it has plenty of hard drive space for storing your recordings, and can run the software with ease. There’s no need to install every piece of software going, just one reliable DAW.
DAW
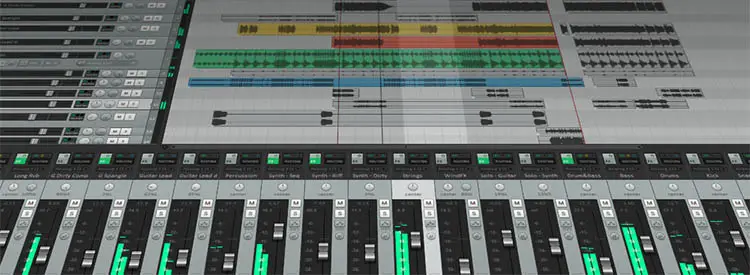
The digital audio workstation or “DAW” is the software you will be using to record. You will need this installed on your computer. Your DAW should communicate with any audio interface, mixer or other hardware you have. An option like Pro Tools or Logic is great for a professional feel, but there are more affordable options out there. We find that Reaper is a good mix of value and features and is currently available here for $60 if you intend to use it without commercial use
Guitars and Accessories
Well, to record a guitar…you need a guitar! Make sure you have a guitar which is well-suited to recording and have thought about how you plan to record. If you have a fully acoustic guitar, for instance, you will need a microphone to pick up the sound. Electric will need an amplifier or can even be recorded via an interface.
If you are wanting to know what some of the best acoustic guitars are for recording then check out our article here 5 Best Acoustic Guitars For Recording.
Microphone
Even if you do plan to do a lot of your recording with a guitar interface, we recommend having a microphone too. This will mean you can also record vocals and other incidental audio tracks to go with your guitar recording.
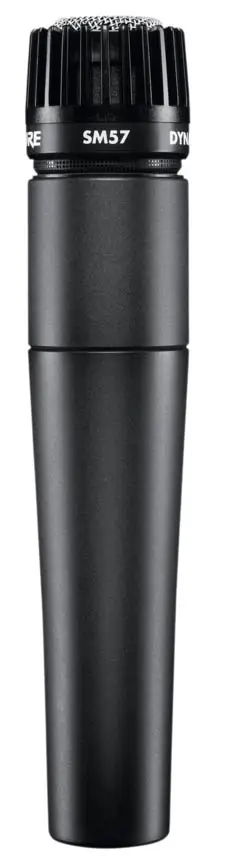
The Shure SM57 above is a great option for both electric and acoustic guitar but there are others which we talk about in other articles.
To find the best microphone for you when recording acoustic guitar read our article here 10 Best Microphones For Recording Acoustic Guitar – Every Budget .
For the best microphones for recording electric guitar read our article 10 Best Microphones For Recording Electric Guitar – All Budgets
Interface/Mixer
You will need to run your audio source, either the output of your guitar or a microphone, into an audio interface or a mixer. This will boost the signal and turn it into something that your DAW can understand and record. A mixer will have multiple inputs, which means you can record more than one audio source, like with the Focusrite Scarlett 2i2.
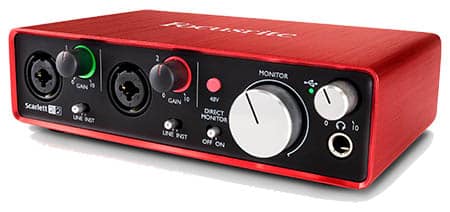
This might mean two mics on a guitar, or a mic on vocals as well as guitar. There are many ways to do it, but a mixer or audio interface with a lot of inputs will give you the most options.
You can buy specific guitar interfaces which can bypass the need for any sort of microphone. While these are good for sketching out ideas and recording on the go, we don’t recommend them for a full home studio as the audio quality doesn’t tend to be quite as good, and some of these interfaces aren’t as reliable. Plus, the lack of an option to use a mic alongside it can be very limiting.
Monitor and Headphones
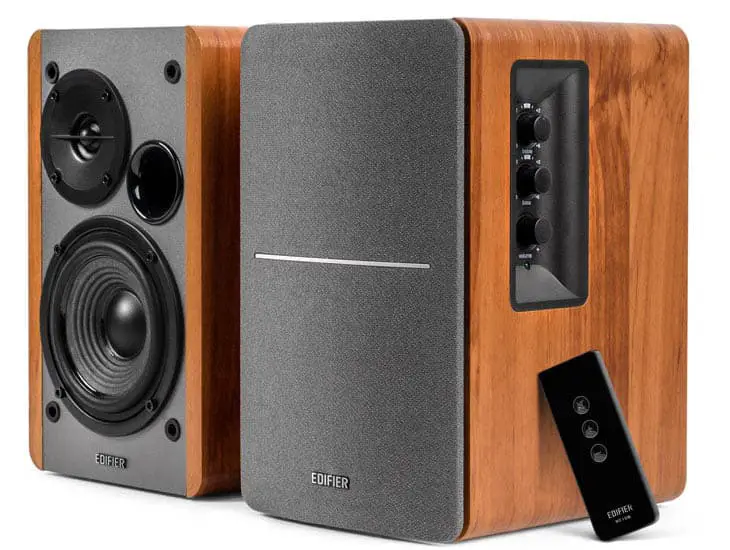
This is an area which so many people don’t contribute enough of their budget to. You should have a decent set of studio monitors (speakers) in any home studio. This is the only way you can get a true reflection of the audio you have recorded. The Edifier R1280T are excellent studio monitor speakers and are affordable coming in around $100.
If you have poor monitors you might miss the fact that some of the guitar has not been recorded well or has background noise, for instance. The only way to create a clear recording is to ensure you can hear what you are doing without poor quality monitors tainting the sound.
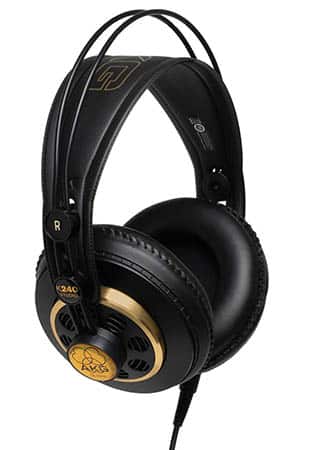
You can use headphones, like the excellent and affordable AKGK240 Studio headphones above during the mixing and recording process. Even if you plan to mix your audio via your speakers, headphones will be useful during overdubs and for monitoring during live recording, and can avoid you getting feedback issues or even ‘bleed’ when you record what is coming out of the speakers onto the guitar track. If you’re playing to a backing track this may become a prevalent issue.
Cables and Accessories
Some people skimp on the details such as cables. Remember that they are carrying the audio signal, and if they can’t do a good job of it they can cause distortion or interference to be recorded. Other accessories you need will include stands for your intrument and microphone, a good quality tuner and spare strings.
Using Your Studio and Recording Tips
The following tips will help you no end when it comes to using your recording studio once it has been set up.
Wire it Up!
Once you’ve purchased everything, it is important to get everything connected and check that it is all working, and that you have the correct leads to connect the microphone to the interface, the interface to the computer and also the signal out of the interface (or mixer) to monitors and headphones. To do this, you will need to understand what is happening to the audio throughout. Bringing us to the next point…
Understand Signal Flow
This is the route your audio signal goes on once the vibrations of your instrument have been created. There are some excellent diagrams on this subject here. This will help you to understand how all of the studio is connected, and where the audio goes throughout the process.
Eliminate Noise
This may sound incredibly basic, but it is amazing how many home studios have a lot of background noise going on. Make sure that you don’t have an air conditioner on during any takes, and pay attention to what is happening in the other rooms of your home. It can be easy to assume that low-level noise won’t be picked up, but it can actually be one of the most annoying enemies of the home producer.
Some less-obvious things can contribute to noise, too. A radiator or other heater may produce some noise, or even a chair! If you have a squeaky swivel chair, it can decide to creak at the wrong point. There’s not much more frustrating than playing a solo perfectly and when you listen back the creak of a chair can be heard ruining it.
Take Care of Guitars
You may have heard the saying “fix it in the mix”. This seems to be the motto of some audio engineers, but not the best ones! The best know that you can’t fix certain things, and you should always start with the highest quality of audio you possibly can. This includes the guitar. Always make sure your strings are relatively fresh, the guitar is tuned and issues such as fret buzz have been eliminated.
Record to a Metronome
You can set one of these up through a DAW, so there isn’t a necessary extra expense when you’re getting set up ready for recording. Metronomes will keep you in time, like a drummer would. The benefit of this is that if you decide to layer things up in the future or create some overdubs, it will be far easier to stay in time. Also, if you plan to get a session drummer or other musician to add more parts, they will be able to do so with ease. Even using loops or other production techniques can be made easier by ensuring everything is neatly in time.
Record Dry
Effects can be added at a later date. Unless you have a specific guitar tone that you are 100% certain you won’t want to change, it makes sense to record the guitar dry and add effects at a later date. Software such as Guitar Rig can model dozens of amps, cabs and even more effects. This means you have the sound of an incredible amount of legendary gear at your fingertips. A dry recording can be molded and shaped into whatever you want it to be using plugins and other software within your DAW.
Record Again and Again and Again
Why not? You have your own home studio now! Once you’ve set up the guitar studio, you can record as many times as needed to perfect your skills and to perfect the take.
Conclusion
Setting up your home recording studio can involve a lot of decisions based on your own preference, the type of guitar you play and, of course, your budget. Luckily, there truly are options for everyone. Not many studios use identical equipment due to the fact there is so much out there. You can truly leave your own unique mark.
How deeply you want to go into this is up to you (and possibly your significant other!) It may be that you set up an area of the spare room, or you might dedicate your whole garage or other outbuilding to creating a home guitar studio. Either way, the potential to create quality recordings and learn exactly how to make these recordings is out realistic, it is easier than it ever has been to learn how to make professional guitar recordings.