
The electric guitar is such a fun instrument to play, it has a huge part in pop and rock music and there are hundreds of thousands of people out there playing their favorite songs on electric guitar in their bedroom, practice rooms and even recording studios around the world. It is natural to want to record and share your playing and there are a number of benefits to doing so. In this article, we’re delving into how to record electric guitar.
As technology has come such a long way in the digital age, there are so many ways to record electric guitar. Whereas 30 years ago you would have had to record to tape via a mic and an amplifier, there are so many other ways to get a decent audio recording. It costs less money and is easier for you to do. The idea of being able to record professional audio at home was a pipe dream for guitarists even 20 years ago. Professional audio is the focus in this article, too, we’re not talking about taking a voice note on your phone, we’re focusing on how you can get pro, useable audio.
Why Learn to Record Electric Guitar?
There are a lot of different reasons to learn to record electric guitar. It is a really useful tool for guitarists, even if you aren’t ready to put your music out there yet. Recording isn’t just for making albums, and benefits of learning to record electric guitar include:
- Being able to send your recordings over the internet. This is great for collaboration. If you want to make music with someone halfway around the world, you can. All you need is to make a good quality recording and you can send it via email.
- Listening back to your practice. There is a lot that you will hear on second listen, which you wouldn’t be able to hear ‘live’. If you’re in the moment and practicing you don’t always have time to reflect on what’s gone right or wrong. Having an audio recording lets you work out what you could improve next time.
- Layering. You can record some chords and then practice things like soloing over them. If you don’t have the benefit of a backing track or someone else to practice with then being able to record can open up a world of possibilities and help you to record your playing.
- You can get feedback from other guitarists. Just like reflecting on your own playing, you can send it to people you know who are professional guitarists and see if they can give you pointers and tips.
- Releasing your music. You can record into software which will let you then add vocals, beats and anything else you want in order to create a full piece of music.
- Adding effects and learning more about post-production. Software like Guitar Rig can bring hundreds of different effects and models of pedals including distortion, delay and reverb onto your laptop. Record your guitar without any effects and you can quickly and easily play around with effects afterward to create your own signature sound.
Ways of Recording Electric Guitar
These are the different methods of recording electric guitar, both with and without an Amp and we break them down further below.
Recording With an Amp:
- Guitar into amp into a microphone into audio interface into a computer. This is a way to mimic what happens in most recording studios. The inclusion of an amplifier gives you the same kind of sound you will be used to from your practice sessions.
- Guitar into amp into USB microphone into computer. This simply cuts out the need for an audio interface. A USB mic can be used on the amp. This is one of the most simple methods for recording.
Recording Without an Amp
- Guitar into guitar interface / audio interface into computer. There are many products out there which act as a bridge between your guitar and your computer (or other device). These boost the signal of the sound coming from your guitar pickups and will then turn it into a loud enough volume to record into your software. This eliminates the need for an amplifier. This audio is normally recorded without effects, but these can be added in software afterwards.
- Guitar in to phone / tablet compatible interface. So useful if you want to make a recording at a guitar practice or just love the idea of being able to pull out your phone and make a good quality recording of your guitar.
Equipment For Each Method
Equipment is absolutely vital. Before we delve into the exact information about specific equipment, we have put together some info on a few different audio signal flows for recording electric guitar. There are many more ways to do this than acoustic guitar or piano, for instance.
Recording Without An Amp
There are multiple methods of recording without having to use an amplifier at any stage in the process. For home recording, this is often preferred, and is a simple shortcut to get good quality audio. This usually means recording into some sort of an audio interface. Below, we’ve explained how this process works as well as recommending some top interfaces for you to use.
Recording With An Audio Interface
A standard audio interface can be used to record your guitar. Many of these have an input designed to take either a microphone or a direct input from an instrument. There are specific audio interfaces designed for guitar (more on this below) but most audio interfaces will be able to help you record to a good standard. The interface will recognize when you have used a ¼ inch jack to plug your guitar into it, and will turn the signal into audio that your computer can recognize and record.
Here is a step by step guide for recording electric guitar with an Audio Interface
and below is my recommended audio for interface for those getting started with recording.
Recommended Audio Interface: Focusrite Scarlett Solo (with Pro Tools)

The Focusrite Scarlett Solo (click here to check price at Amazon) is arguably the most popular and well-known of all the audio interfaces out there. It lets you record one instrument input by either ¼ inch cable (meaning you can plug your guitar straight in) or it can record from a microphone (if you are looking to do both then consider the Scarlett 2i2 instead – click here to check price at Amazon). Using a microphone means you will have to amplify your guitar and take your recording directly from the amp.
The Focusrite has full compatibility with both Windows and iOS. It can be plugged into a Mac or a PC and work with your preferred DAW in a matter of minutes, just install the drivers and you’re good to go. It doesn’t need any sort of power supply as the USB cable will provide all the power it needs. The sample rate goes up to 192 kHz and 24-bit audio. It has ultra low latency and this means you can use plugins while you are playing and be able to hear the effects on your audio live.
It comes with some free plugins and licenses to software that can be used alongside your audio interface. This is an exceptionally reliable interface which is portable enough to carry out and about in your guitar case. It gives you a choice between using a mic to record your amp or recording the guitar directly.
Recording With A Guitar Interface
There are many guitar interfaces on the market which have been specifically made for electric guitar. These work in a similar way to standard audio interfaces, but are designed to more clearly boost audio from guitars and give more controls over the guitar sound. Some even have their own built-in effects and amp modelling for you to use. Guitar interfaces don’t have XLR inputs, which are what would be used if you were using a microphone. Keep this in mind when deciding which to purchase.
Recommended Guitar Interface: Line 6 Pod Studio UX2 USB Audio Interface
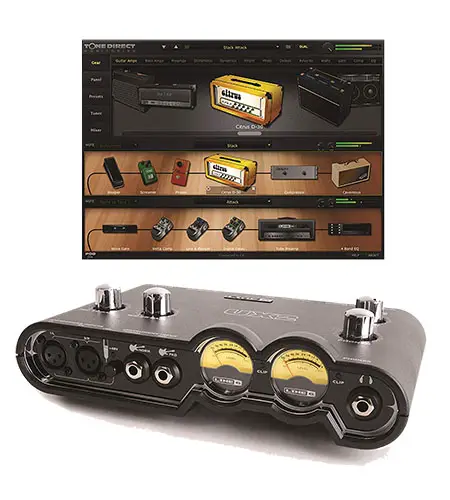
Line 6 is a brand which has a lot of different amplifiers and multiple interfaces. They bring modern technology to the world of guitar recordings and make it simple and easy to plug in and play. The manufacturer knows what guitarists want and there are loads of effects available as part of this interface, which can be used to create the signature sound you are going for as a guitarist.
The UX2 comes with POD Farm 2.5 which has over 80 different bass models and preamps for you to use. You can call upon classic and vintage tones with a few clicks and listen to them in real time while playing or add them once you have recorded. Click here to check the price of the UX2 at Amazon
It is so easy to use that pretty much anyone can do it. You can just drag and drop your effects and amp models into the interface, you can also tweak them and call upon thousands of presets from these amps to change your tone in an instant.
There are a number of other guitar interfaces on the market with a huge variation in price. Some of the affordable options may only be up to scratch if you plan to make rough demos and recordings you will later polish or re-record in a more professional environment. The top-of-the-line guitar interfaces can give you clear and quality audio that sounds professional in nature.
Recording Electric Guitar On Phone or Tablet
Amazingly, as technology has continued to adapt, you can record your electric guitar playing onto something as portable as a phone or a tablet. This is so useful if you want to make a recording at a guitar practice or just love the idea of being able to pull out your phone and make a good quality recording of your guitar.
Just like the guitar interfaces for computer, you can get models which will plug into your phone. These will do a similar job, and by tapping into the recording abilities of your phone you can record directly from your guitar or through a microphone which is connected to your phone.
Recommended iOS Digital Guitar Interface (iPhone, iPad, Mac): iRig HD2
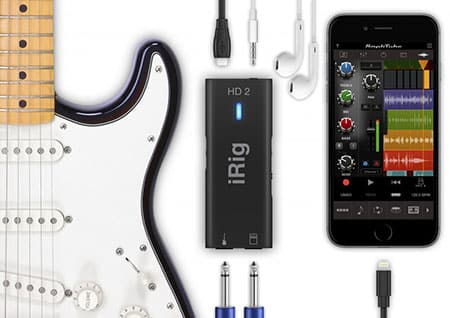
A great interface for recording electric guitar on phone is the IK Multimedia iRig 2 Mobile Guitar Interface (click here to check price at Amazon). This has a focus on recording on Apple devices but it can be used with a wide variety of mobile phones and tablets. It is affordable, and works very simply, just connect to your device and record via the included IRig applications.
These include amp modelling and effects pedals (Amplitube) which make it easier than ever to alter your sound. There is also a gain control on the device which allows you to set the volume of the inputted guitar.
You aren’t tied to using the amp simulation app, however, so you can use others. The ones I would recommend would either be Bias FX Mobile by Positive Grid or Jam Up Pro which also integrate with Garage Band so you can record the music directly on your iPad or iPhone.
Recommended Android, Smartphone, Tablet Digital Interface: iRig UA
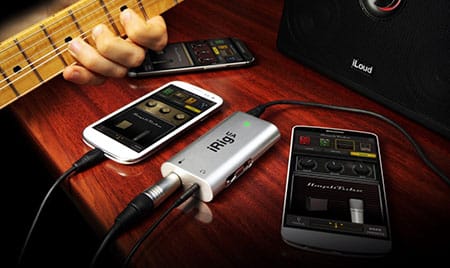
Essentially the iRig UA (click here to check price at Amazon) is the same as the iRig HD2 but for android. It claims to works on any smartphone or tablet that supports Android 4.2 or higher and host mode/USB OTG .
Read more on its requirements here (iRig website), one thing to note is that Android devices equipped with USB-C socket require a USB-C male to Micro-USB female adapter with data transfer capability like this one at Amazon
Recording With An Amp
There is still a school of thought that using your amp is still the best way to get a great quality recording of your electric guitar. No matter how good amp modeling gets, and no matter how convenient the guitar interfaces may be, an amplifier adds something to the audio and gives the bite and clarity you’re used to when playing live or practicing. Why spend hundreds of dollars on a top amplifier and then not use it as part of your recordings?
Recording with an amp is sometimes seen as the ‘old fashioned’ way. Naturally, 20 years ago this was the only option we had for getting recordings of our electric guitars. So, what do you need to know when recording your guitar after it has been amplified?
Essentials For Recording Electric Guitar On An Amp
- Choosing the right microphone is essential. The mic should have a high SPL and be able to handle the high volumes you’ll probably be using to play your guitar. It should also be pretty rugged and stand up to the punishment of being in a home studio. If you need to know what microphone to purchase then make sure to read our post on the 10 Best Microphones For Recording Electric Guitar, to make sure you get a quality model. We cover options to suit every budget.
- Mic positioning should never be ignored. Where you point the microphone on the amplifier, how far away it is and even the angle it is pointed at can make a big difference to the sound. The ability to monitor live will mean you can tweak and compare the sound before you commit to a performance. This incredible guide can show you much more about how to position your microphone on an amplifier.
- Get your amp settings and any effects right before you record. Once you’ve committed to audio with effects and amp settings recorded within, it is virtually impossible to make a lot of changes, and you certainly can’t get rid of the effects or the sound of the amp. This means that you should know exactly the sort of sound you want before you play.
Recording on PC & Mac
Recording on PC
Plenty of PCs running Windows or even Linux as the main operating system have the power you will need to record. Software for recording (DAW) combined with any software specific to guitar interfaces you will need can take up quite a bit of hard drive space and need some power to run. The higher RAM, the better.
Always check the compatibility of any interfaces you plan to purchase. USB audio interfaces usually have the ability to record onto PC or Mac, but it is worth double checking.
Music software which can run on PC includes Pro Tools, Reaper, Cubase and FL Studio. Pro Tools is the ‘industry standard’ version of software, and natively has a huge amount of plugins and effects, but it costs a pretty penny. Reaper may provide a more affordable alternative.
Recording on Mac
Mac’s operating system is often seen as the best friend of creative people! Macs are designed with things like recording studios in mind. For this reason, Macbooks, iMacs and Mac Pros are popular among audiophiles. This means that there are plenty of compatible software and great platforms for your recording operation.
Music software for Mac includes Reaper, Pro Tools and Logic. Logic is Apple’s very own recording and production software, and it is professional enough to be preferred by many audio engineers around the world.
Be cautious if buying a new mac as to which type of USB connection they have. Some have moved to USB-C connections which are fast and effective but will require specific types of audio interface in order to use them.
The Recording Environment
If you plan to record straight from the output of your guitar to the input of a USB audio interface or guitar interface then the environment will be taken out of the equation. Though some electrical interference could be picked up, the acoustics of the room will not play a part. This can be a real benefit to using this method of recording and means that you won’t have to worry about treating your room acoustically.
If you’re planning to record electric guitar by using a microphone then the acoustic properties of the room should be considered. The ambiance doesn’t play as big a part as it would if you were recording acoustic guitar, and to an extent, the volume of the amp means the nuance of the room won’t be so easily picked up.
You should opt for the most acoustically ‘dead’ room you can. Stuffing the room with couches, duvets, blankets and pillows is a way to soak up a lot of the reverb. If you imagine recording the guitar in your bathroom, it will probably be soaked in reverb that sounds like slapping. The idea is to get a recording which is ‘dry’ and doesn’t have these tinges of reverb. They can always be added later, but taking them out of a recording is a totally different equation.
The Recording Process
Getting your process right is essential. We’ve provided a step-by-step to make sure nothing gets forgotten about when recording.
- Set up your guitar. Make sure it is in tune and there are no annoying issues like fret buzz. If there are, get it fixed by a professional.
- Connect everything and check your levels. A clear audio signal without peaking is what is desired. Too quiet and the audio may be unusable, too loud and it will distort.
- Do some practice runs and compare mic positions. If you’re using a mic, experiment a little in your run-throughs to ensure you understand the difference this is making on the recording.
- Set up a metronome. If you’re playing without a backing track, staying in time can be tough. A metronome can count the tempo for you and help greatly.
- Check there is no background noise. Everything from the TV to the AC unit should be off, even if you think you can’t tell the difference.
- Record multiple times. Even if you think you’ve nailed it with the first run through, the more takes you can have to choose from, the better. Often, with digital editing techniques, the final audio we hear on an album has been butchered, with the best parts taken from multiple takes. There is no shame in doing so.
- Check you’ve got what you need before editing. There’s always plenty that can be done in the edit, but only if you have the right source material to start with.
Editing and Mixing
Spending some time to get used to the editing software will allow you to get far more out of your audio recording in the future. Most people learn how to record, but then leave the recording exactly as it is. By learning a little about how to use software such as Reaper, Pro Tools or Logic, we can make sure that we optimize the audio. Tools such as compression, reverb and EQ can all help to create a far more professional sound.
Editing is also your opportunity to layer up! There is no reason to just have one guitar piece, and you can try to improve the quality of your recording by doubling up and playing an octave up or down or adding root notes as a sort of ‘bassline’. If you play other instruments, add them in and start to turn your guitar recording into a more fully-fledged track. This is especially useful for your own compositions.
Conclusion
The benefits of recording electric guitar, combined with the fact that it can be done so simply and relatively affordably, means that it is a worthwhile skill to learn. Whether you just want to record your own practicing, or you and a friend want to start making your own tracks, it doesn’t have to be immensely difficult. Gone are the days of needing a recording studio to do every aspect of the recording process. DIY results can even be as good as the pros with some practice.