
Cheap guitars are made from low-quality components, cheap woods, and are often set up wrong.
This is because the only way to make these instruments profitable, but affordable, is by cutting corners, employing unskilled laborers, and undertaking low-quality control standards.
While often the sound on the cheap guitars may not get affected too much (depending on your preference), the playability does.
Check out the video below where two guitars are compared. One guitar cost $50, whereas the other one (Seagull S6 Original) cost over $400. Can you tell the difference between the two guitars?
As a whole, one of the ways manufacturers cut corners is by setting up a cheap guitar with high action. This is because to lower the action requires skill and time to cut the nut and adjust the neck and bridge. Something that manufacturers’ do not want to spend on or they will not make a profit.
Another reason for the high action in the cheap guitars is the changes the wood will undergo due to humidity during shipment.
Cheap guitars are built en masse in Asian factories, then shipped in massive quantities worldwide.
As guitars are still (for the most part) built from wood, the change in humidity from the factories to the shipping containers to their final destinations will affect the wood.
Wood subtly changes shape according to fluctuations in humidity.
This doesn’t mean that guitars will drastically warp and melt like a Dali painting. Still, these minor fluctuations in the guitar’s neck and body shape can affect the instrument.
Guitar action is typically measured in tenths of a millimeter.
That means minor changes in the shape of the wood can have significant consequences for the guitar’s action.
If the guitar’s wood expanded too much, it would cause the action to become too low, causing dreaded “fret buzz.”
Because the guitar needs to be at least somewhat playable upon arrival at a music store, some of the factories deliberately set the action high to reduce the effect of this wood warping.
What Is Action On A Guitar
Action on a guitar is the distance between the guitar’s strings and the fretboard. This distance plays a significant role in the instrument’s playability, especially for beginners, as the action determines how easy it is to sound a note by applying pressure to the string.
When it comes to action on a guitar, a few millimeters difference, and even a tenth of millimeters, affects playability enormously.
Guitars with high action are harder to play requiring:
- more finger strength and,
- more significant pressure to sound a note.
As a result, beginners using guitars with high action often complain of finger pain and finding it too hard to play the songs they like.
High action can also affect the tuning stability of your guitar.
Having to press the string further to play a note will stretch the string, potentially throwing it out of tune.
All of this is not to say that you need extremely low action!
In fact, if the action is too low, the string will hit frets other than the one you’re playing, causing a dead, muted, buzzing sound. There’s a low-action “sweet spot” that you need to hit to maximize your guitar’s playability.
To optimize the sweet spot on your guitar, you can either have your guitar set up by a professional or set up the guitar yourself.
In my article “how to do your own guitar set up,” I will illustrate step by step how you can set up your cheap guitar to be more playable for you.
One thing to note is that guitars should be set up regularly to keep them top-notch. Check out our article “How Often Should A Guitar Be Setup” for more detail on this.
What Is Good Action On A Guitar?
Good action on a guitar depends entirely on your playing style. The “sweet spot” is low enough for easy playing but high enough to prevent fret buzz. Generally speaking, this is at 4/64″ (1.6mm) on the high E string and 6/64″ (2.4mm) on the low E string.
Acoustic guitarists often prefer higher action than electric guitars. This is to improve string resonance. The action in acoustic guitars is typically set at around 5/64″ (2.0mm) on the high E string, and 7/64″ (2.8mm) on the low E string.
Before deciding if your action is good or bad, you should consider your playing style and level of ability.
Players who prioritize lightning-fast runs and ultra-light playing can typically get away with far lower action than those who bash away at the guitar with powerful strokes.
Both styles have their benefits, but they require different setups.
More intricate playing causes the strings to vibrate far more, meaning they are more likely to accidentally graze the wrong fret. Whereas lighter player causes lighter vibrations, reducing this possibility.
Perhaps the best example of this in popular music is the famous rock band AC/DC.
Malcolm Young, the rhythm guitarist, almost exclusively played chords. He occasionally dabbled in solos and melodies early in the band’s career. Still, Malcolm spent most of the years 1980 to 2010 playing chords before the seventh fret. He tended to hit the guitar extremely hard.
On the other hand, his brother Angus played lead guitar. His playing style was characterized by aggressive vibrato, speedy licks, and guitar solos.
The best way to picture the contrast in their playing is the song “Thunderstruck.”
The lightning-fast sixteenth notes throughout the intro are Angus’ parts. The chugging B chord underneath and the meaty power chords through the chorus are all Malcolm.
Angus Young kept his guitar’s action relatively low. He needed this to facilitate his fast-playing, accentuate his lighter strokes, and ensure that his vibrato was wide and audible with zero buzzing.
Malcolm, on the other hand, used higher action. This meant that he could hit the guitar extremely hard without the strings accidentally buzzing against the higher frets. This allowed the strings to vibrate powerfully and freely, producing a louder, more authoritative sound than softer strokes could ever accomplish.
Each different level of action complemented the style of each guitarist.
If you’re just starting out, you’ll be playing a variety of techniques. For this reason, lower action like Angus Young is probably best. It will reduce the pressure you need to get a good sound. This means you’ll develop calluses faster and will make getting better in your crucial first year easier.
How Do I Lower The Action On My Guitar Without Buzzing?
Before you take to your guitar with any tools, be aware that most guitar modifications and setups are best performed by trained professionals.
Guitars are susceptible to minor changes, and it is possible to damage your instrument when trying to improve it.
Cheaper guitars, which are the ones most in need of adjustment, are usually made of softer wood, which will warp, bend, or break if you try and muscle through resistance.
Making adjustments to your guitar requires some specialized tools, which you may not have access to as a beginner guitarist.
As a beginner, it’s worth taking your guitar to a luthier and asking them to do a beginner’s setup.
They will know how to lower the action and maximize playability without risking damage to your precious instrument.
However, if you’re interested in learning how to lower your guitar’s action yourself, here are some easy steps you can follow. Just remember: always measure twice, and make all adjustments gently and slowly. If it becomes strenuous or challenging to make the adjustment, stop immediately so you don’t damage your guitar.
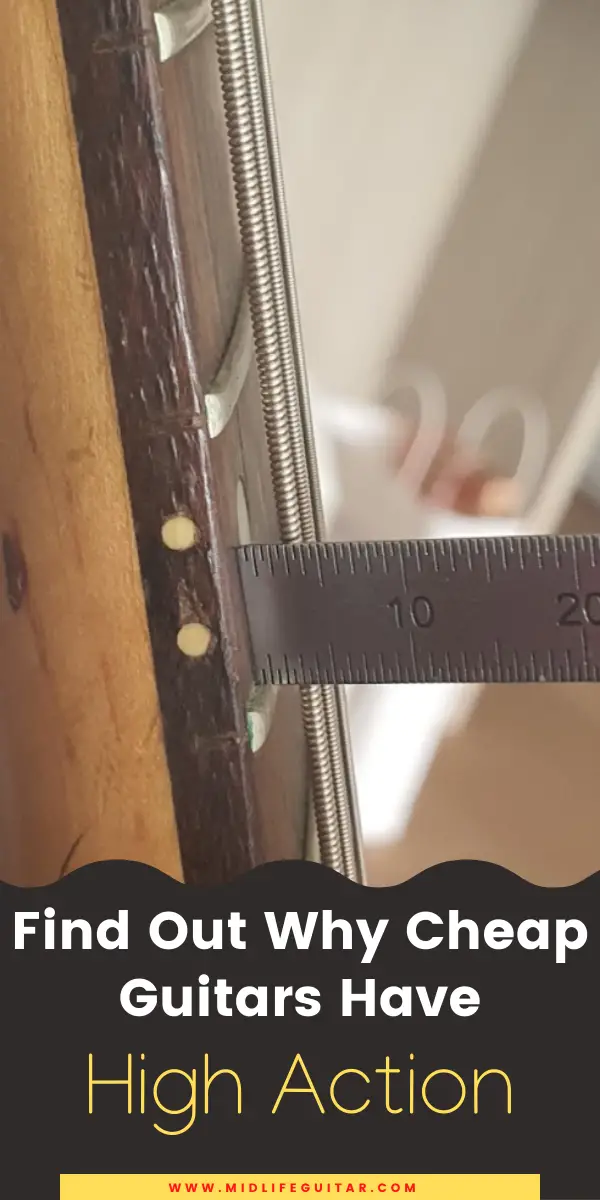
Step 1: Measure Your Action
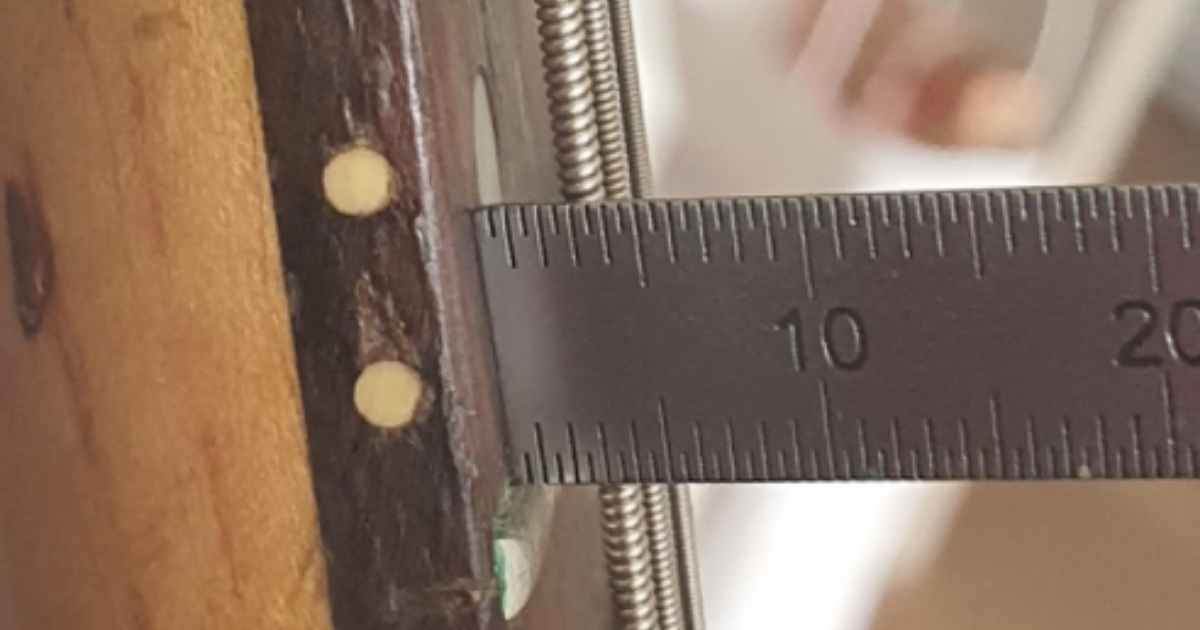
Your first step should be to measure the action on your guitar. For this, ensure your guitar is tuned and the truss rod is straight if you have a steel-string guitar. Otherwise, a bowed neck will affect the action.
Measure the distance between the fretboard and the bottom of the guitar string at the twelfth fret of each E string.
Note: Conventional rulers and tape measures won’t work for this. Instead, you need an action gauge ruler, such as the Baroque Action Ruler Gauge or the FretGuru String Action Gauge.
Step 2: Loosen Your Strings

You shouldn’t remove your guitar strings entirely to lower the action. However, keeping the strings on, and slackened, will reduce tension on the neck and allow you to make adjustments more easily. It will also reduce the chance of breaking your strings.
To loosen your strings, simply detune the guitar a little bit.
Step 3: Adjust The Bridge
Depending on what type of guitar you play, your bridge will adjust differently.
Acoustic guitars tend to require you to lower the guitar’s saddle and/or nut to lower the action.
Before you adjust the bridge on your electric guitar, check out what type of bridge your guitar uses (tune-o-matic, Floyd Rose, or Stratocaster-style). This is because each bridge will need to be adjusted differently.
Let’s review each of the bridges:
Step 3a: Adjust The Tune-O-Matic Bridge
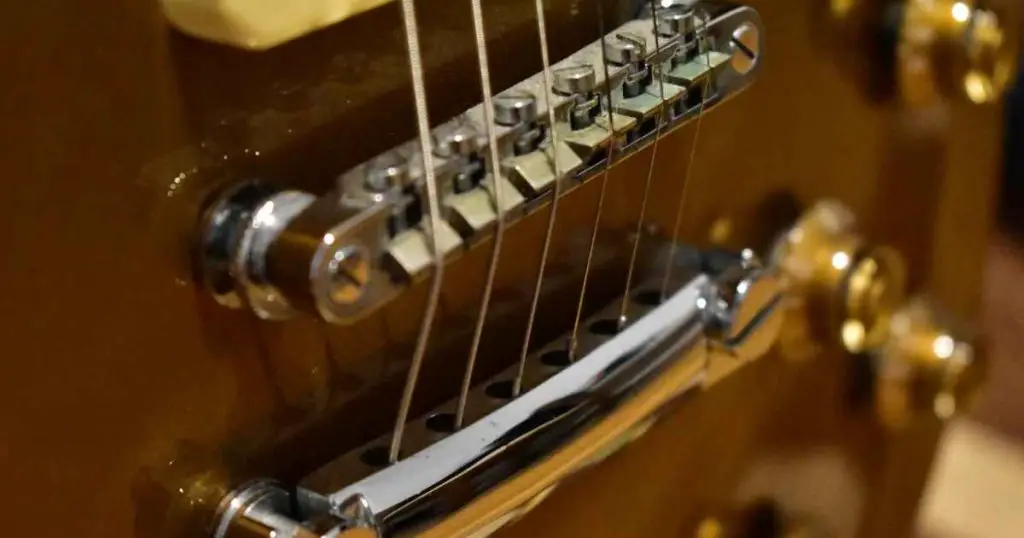
The tune-o-matic bridge is commonly found on Gibson-style guitars.
They have two flathead screw poles that you can use to adjust your guitar’s action. Once you’ve measured the action on your low and high E strings, adjust the heights of these two posts.
If your low E string is too high, lower the post on that side. Perform one-quarter turn of the post at a time. Re-tune your guitar and measure the action after each quarter turn. If it’s still too high, repeat these steps. The same applies to the high E string.
If you feel like the action on your middle strings is too low, you need to raise the action on all of the strings to address this.
This video can help more with this!
Step 3b: Adjust The Floyd Rose Bridge
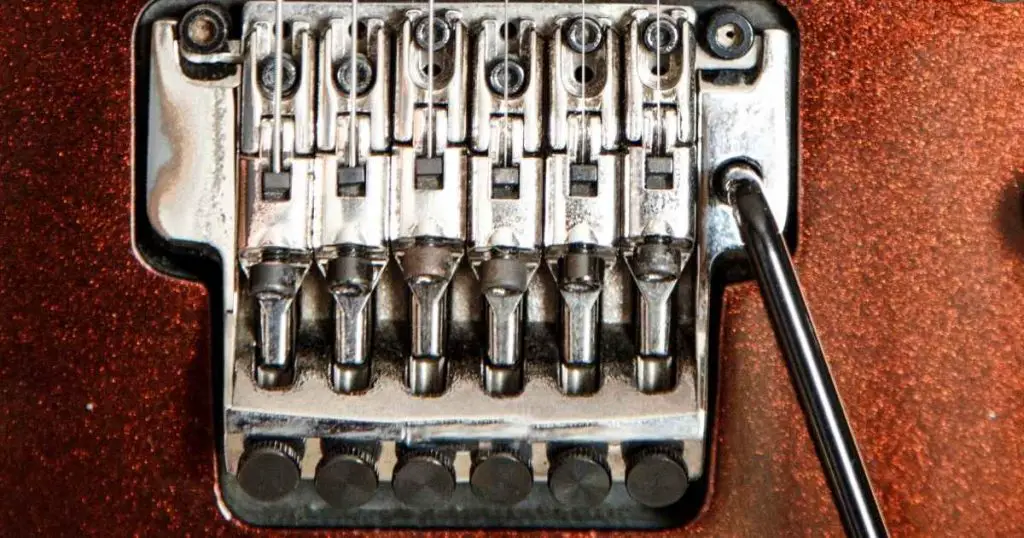
Floyd Rose bridges are commonly found on “shredder” guitars.
Floyd Rose bridges are similar to tune-o-matic bridges, with two posts for adjusting your guitar’s action.
However, rather than a flathead screwdriver, you’ll need an Allen wrench. A 3mm wrench should do the trick.
Floyd Rose bridges need to be resting in a low position before you can adjust the action.
Please note that if your guitar’s bridge is raised, as in the picture below (a Strat-style bridge, but a similar issue for demonstrative purposes), you’ll need to fix that first.
If that’s all in order, adjust the pole pieces with your Allen key a quarter turn at a time, just like you would on a tune-o-matic bridge.
This video can help more with this.
Step 3c: Adjust The Stratocaster-Style Bridges
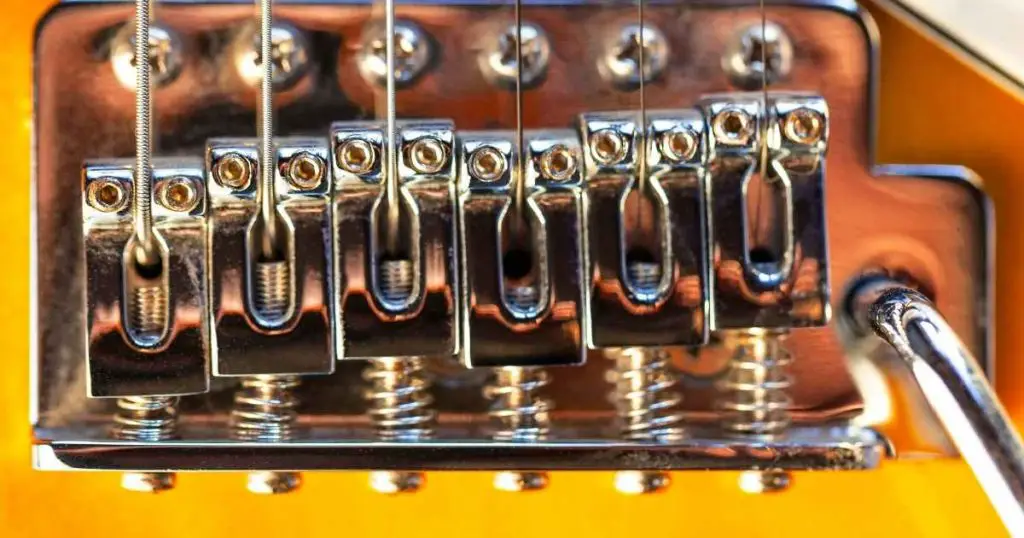
My guitar, pictured below, has a Stratocaster-style bridge.
This provides the most individual control over action, but it also requires the most work.
Each string can be individually adjusted, using a 1.5mm Allen wrench on the two screws in the saddle.
You’ll need to measure the strings individually to properly do this, and adjust both screws for each string to the same height. Adjust the action for both E strings first, and then B and A, and finally D and G.
Tune the guitar and measure the action between each adjustment.
This video can also help with adjusting the Stratocaster-style bridge.
Conclusion
Action is one of the most essential factors in the playability of your guitar.
Cheaper mass-produced instruments often have higher action, requiring setup and adjustment, preferably by a professional. However, if you want to learn how to do it yourself, this handy guide helps get you started.