
If you have learned how to play acoustic guitar and you enjoy playing either your own songs or cover versions at home, it may be time to start recording yourself playing. This guide features our full guide and top tips on how to record acoustic guitar either within a studio environment or at home.
Home recording is something that was incredibly difficult to get right even 10 years ago, but it has become easier and easier. Some successful albums have even been recorded in peoples houses rather than dedicated studios. Accessible, professional equipment and information available online to walk you through the process mean that you can achieve excellent results with just a little research. You don’t have to study music technology in order to create guitar recordings at home.
Why Learn to Record Acoustic Guitar?
Whether you plan to record yourself or want to record friends playing, there are many reasons to learn how to record acoustic guitar properly. You may think you already know the reason you wish to learn, and that’s great! However, there are some other reasons you may not have thought off.
Reasons to learn how to record acoustic guitar, and the benefits of doing so, include:
- Record your practising. A lot of the time, when we practice, we don’t have time to evaluate our playing throughout. Listening back can give you a new insight and you may pick out things you’re doing particularly well or particularly badly. A lot of bands and artists record their practice sessions in order to review what worked.
- Record your own compositions. Gone are the days where you needed to get a record deal and convince someone to pay big money for you to head into a studio to get good quality demos of your own songs. A lot of the most famous and successful musicians out there get started by putting demos out. Whether you want to do heavy editing and experiment with your recordings or just have an accurate representation of your playing, being able to record is the first step.
- Sending your recordings for collaboration. This is a great advantage of being able to record. You can send the files all over the world, so if you have band mates or other collaborators in different locations it is simple to email over a file and have them add their instrument to it.
- Layering is another huge benefit. Multiple guitar lines and even additional instruments can be added once you’ve recorded your guitar, something it is not possible to do on your own in real time.
Equipment You Will Need
It is impossible to get a good guitar recording without some equipment. Recording on your voice memos on your phone can be a solution for remembering your ideas or checking on your playing, but it doesn’t give fully professional results. One day, phone mics may reach this level of quality, but they’re not there yet. It is important to get the right gear to make sure you record to a decent standard.
Best Acoustic Guitar For Recording
It may be obvious, but the guitar you will be recording is one of the most vital pieces of kit.
We have written an entire article on this where we breakdown and recommend the 5 Best Acoustic Guitars For Recording. If you are looking to buy a new guitar with recording in mind or think that you might do in the future and want to make a wise forward thinking decision then it is well worth reading.
Without a good quality guitar, a good recording is impossible. We’ve compiled a list of the best guitars for recording if you are in the market for a new one, but the guitar itself means the accessories and fundamentals of the guitar, too. For instance, a fresh set of strings can be a good idea before recording. A reliable tuner can make sure you aren’t recording a guitar which is out of tune and will sound horrible as soon as you put it with other instruments.
If your guitar has any sort of issues, don’t try to hide them or ‘fix it in the mix’. It makes sense to have your guitar professionally set up before any recording sessions you are serious about. If you can hear things like fret buzz or your guitar isn’t playing as nicely as you’d hope, this may well come across in your recordings.
Microphone (Or Microphones)
The main piece of kit tasked with recording your acoustic guitar is the microphone (or microphones) you will be using. Some people consider just one to be enough, and done right one mic can do the job. However, a lot of people use multiple microphones to ensure they are getting the best results. Even two mics on the same source can give a lot of options and the chance to blend the two audio tracks for a fuller sound.
Choosing the right microphones is important and it can be incredibly difficult if you’re new to the world of music technology. Take a look on a music store online at the mic selection, you will quickly see that the prices vary from $50 to $5,000, and that there are a number of types of microphones which can be used for the job.
Fortunately, there are some great, reliable mics which are up to the task of recording acoustic guitar and don’t cost a huge amount. We talk bout these in another post here 10 Best Microphones For Recording Acoustic Guitar (For Every Budget) .
Condenser vs Dynamic Mics
This is one of the key things to get your head around, and the differences are pretty simple.
- Dynamic mics are often used for live events. They are usually rugged and the capsule is unlikely to get damaged if they are dropped, for instance. They can be less sensitive, too, so the clarity and audio fidelity may not be as high.
- Condenser mics require phantom power, which is a power source provided by an audio interface or mixing desk. They are more sensitive and can provide more detailed audio recordings. They’re also not as rugged and therefore not great for live use.
Very broadly speaking, condenser microphones are probably the best choice for recording acoustic guitar with as much clarity as possible, but that doesn’t mean that there aren’t good dynamic options. Two mics we recommend are below.
Recommended Microphones
We have written a separate article here on the 10 Best Microphones For Recording Acoustic Guitar where we go in to more detail on the two microphones below plus 8 others worth considering.
However if you want two great recommendations that you wont go wrong with then here they are:
Shure SM57
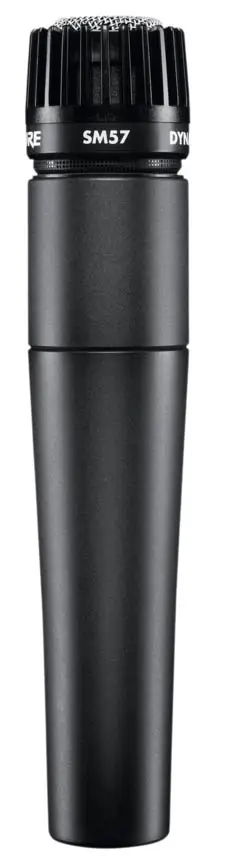
This is a dynamic microphone which is used a lot on stage. It is known as being one of the most versatile mics and is great for laying down demos. Check the price at Amazon for the Shure SM57here.
AKG Pro Audio C214
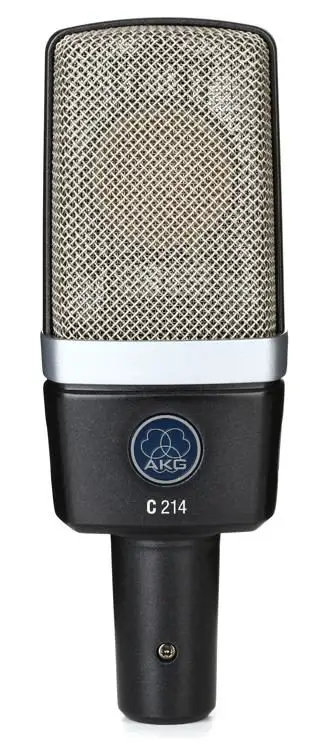
This is a slightly more expensive microphone, but one which is wonderful for recording acoustic guitar as well as a host of other instruments. It has numerous pickup patterns and if used with the right interface it can provide crisp and professional guitar recordings. Check the price at Amazon for the AKG Pro Audio C214 here.
To USB or Not to USB? That is The Question!
If you’ve been looking for a microphone to record your acoustic guitar already, you may have noticed a huge amount of USB options. The technology has come a long way in recent years. A USB microphone would have been something to steer clear of for recording audio 10 years ago, but now there are some good options from good brands.
USB mics come with their downfalls, you can only easily use one at a time and the audio clarity doesn’t have the same level of control you would get with other methods. However, if you are just recording one instrument and don’t want to go to the expense of buying an audio interface, they can be a good middle ground. USB recordings are able to give a good enough quality to go into a commercially released song, if you follow the rest of the steps.
Audio Interface
The audio interface is how your computer and microphones will most likely interact. If you aren’t familiar with the technology of recording, mics are usually designed with “XLR” outputs. This is a type of connection designed for mixing desks rather than to go straight into computers. Your audio interface is a way to take the signal from the mic, via an XLR lead, boost it to the volume required for your computer and then communicate with your recording software to let you record clear audio.
If you don’t have a USB microphone or a mixing desk with pre-amps, the audio interface is an essential piece of equipment. Fortunately, they have a lot of other bonuses and are worth the purchase. As well as providing power to the microphones (if required) they can allow you to input multiple microphones at once, or multiple mics and instruments. You may be able to directly plug in other instruments to your interface via jack leads or XLRs. The ‘gain’ control will allow you to choose how much to boost the signal so that it is clear, but not excessively high so it “clips”.
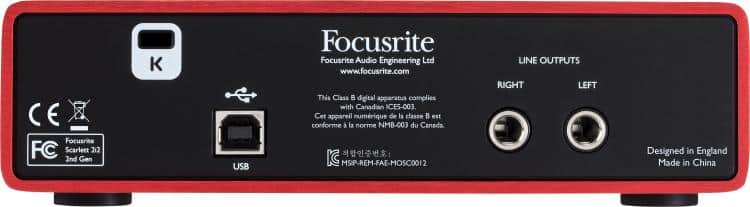
Recommended Interface: Focusrite Scarlett 2i2
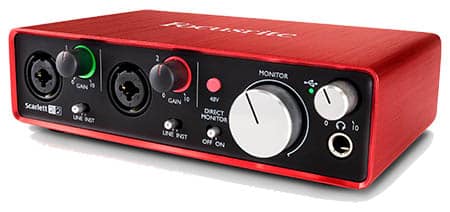
One of the most popular audio interfaces is the Focusrite Scarlett (Check Price at Amazon). It is simple to set up and plugs in via USB. It automatically installs drivers and is pretty simple for hooking up to all kinds of different recording software.
It has two different inputs and can send power to your mics if needed. The interface also allows for direct monitoring via headphones to check the audio coming through. It doesn’t cost a fortune, comes with software for you to try out and is reliable, plus it is easy to take out and about in your guitar case if you like to record on the go.
The interface also allows for direct monitoring via headphones to check the audio coming through. It doesn’t cost a fortune, comes with software for you to try out and is reliable, plus it is easy to take out and about in your guitar case if you like to record on the go.
Recording Acoustic Guitar Through An Amp vs Direct
Recording Through an Amp
Using an amplifier to record acoustic guitar can be done. There is nothing to stop you if you have the right equipment. This will mean a good quality amplifier and a pickup on your guitar. This can be installed after buying or it will be included within an electro-acoustic guitar which will let you plug it into other things such as amps and PA systems via a ¼ inch cable.
Recording through an amp is usually only a practice used for electric guitar. In the world of acoustic guitar, amplification via pickups is not used to enhance the sound, instead, it is seen as something of a necessary evil. You shouldn’t need to use an amplifier for the acoustic guitar and can get clarity from recording directly.
Recording Acoustic Guitar Direct
This is the most common way to record your acoustic guitar. By placing microphones facing the guitar you can ensure that the sound has not been degraded at all by low-quality pickups, or distorted by any guitar amp. Acoustic instruments normally sound at their best when the clarity of their sound is properly harnessed. This means the only amplification you should need when recording acoustic guitar is that from the sound hole!
Recording Acoustic Guitar On A Phone (iOS and Android)
In the modern age, most of us use multiple devices at different times. Though you may think of recording being onto a desktop or laptop computer, this doesn’t have to be the case. There are options for recording onto other devices.
There isn’t much that our phones can’t do these days. Recording is entirely possible on a phone and though you won’t have the wealth of options you would with using a computer, you can lay down demos whilst on the road or make use of the smartphone you probably always have on you! Many phones even come with recording and music making software on them now, such as Apple’s GarageBand app.
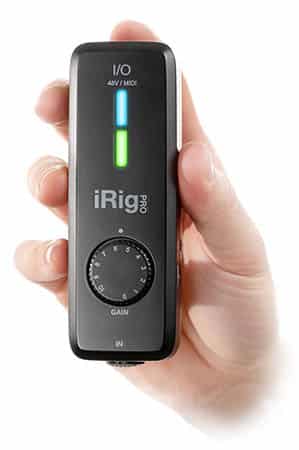
To record on your phone, you can use a specifically made interface to allow you to connect to a microphone, such as the IK Multimedia iRig Pro I/O (check price here at Amazon) compact instrument/microphone audio interface . This lets you connect whichever microphone you wish, from XLR connections or ¼ inch jack cables.
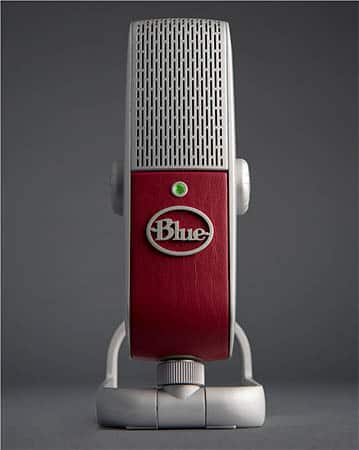
Alternatively, you can use microphones which connect directly to your phone. The Blue Raspberry (check price here at Amazon) is an example of a compact but powerful microphone which can be set up for use on an iPhone in a matter of seconds. You can record onto your audio notes or directly into software like GarageBand or other apps you can use to produce music. You can also use an iPad if you have one. Apple recently announced iPad support for Logic Pro, an industry-standard piece of recording software.
Recording Acoustic Guitar On PC / MAC
If you do have the option to record onto a computer, either a laptop or desktop, this may be the best option for you. It is easier to connect multiple microphones, whereas a phone will only allow you to connect one. Also, you will have a lot more choice when it comes to software and editing once you have made your recordings. You can quickly set up an audio interface or USB microphone to work with your computer.
If recording on computer, make sure you take the time to learn a little about the software you will be using. Buying professional standard software can make all the difference, and make your life a lot easier. Some USB interfaces and microphones even come with free access codes to professional recording software.
Consider The Acoustic Environment
This is one of the biggest and most common mistakes when it comes to recording acoustic guitar. There are so many recordings out there which pick up all the acoustics of a room, and the goal when recording should be to take the room out of the equation. If you’re lucky enough to live in a replica of Abbey Road studio, your rooms may sound lovely on recordings, but most homes do not.
A reason we try to keep recordings as ‘dry’ as possible (without the sound of the reverb in the room) is that we can add reverb at a later stage in the process. Reverb, echo and delay are easy to add in, but they are almost impossible to get rid of. For this reason, the room you choose should be chosen carefully.
Opt for the room in your home (or wherever you plan to do your recording) with the least natural reverb. This will usually be a room with lots of furniture but not many hard surfaces. Fill it with as many things that can deflect and soak up reflections of audio vibrations as possible. Rooms with couches and beds in can often be great for home recordings. Carpeted floors are often preferable, too, as they are less likely to give harsh audio reflections.
If you wish to, you can purchase acoustic treatments online or even make your own. This can be an affordable thing to do, especially in small rooms, and just a few acoustic panels can make a massive difference to the overall sound you end up with.
Stay away from recording in the kitchen or the bathroom. The echoes may make your singing in the shower sound better, but for recording acoustic guitar it will probably be an out-of-control nightmare when you come to mix the audio.
Mic Placement and Positioning
Some music producers have dedicated their whole careers to learning the best positions to put microphones in for recording. Different instruments have different sweet spots. It can be easy to assume that just pointing a microphone in the general direction of the guitar will get the desired effect, but the angle and where the mic is pointing can make a huge difference.
Mic placement techniques are not the most complex for acoustic guitar. If you are using multiple microphones then you will even have something of an opportunity to experiment with where you’re putting your mics.
You should always do some test runs and move the mics around to see what the best spot is, the truth is that each room and each instrument has its quirks, and the real talent for recording will come from knowing when the results are starting to sound good.
Of course, to get the best positions, you are going to need mic stands. Fortunately, a decent, sturdy stand doesn’t cost too much. They are definitely worth the money to ensure you avoid the mic moving around while you are trying to get a top recording of your guitar playing.
If you are using a single microphone setup, the best starting place is to point the microphone at the point where the fretboard joins the body of the guitar. Imagine a line coming out from the capsule of the microphone like a laser beam, this should be placed just before the fretboard starts. This is a good test run. You can take a recording like this and see how it is sounding. Tweaks are possible to get the best results.
Why not just point straight at the soundhole? Well, this doesn’t actually tend to give the most balanced overview of the guitar, and it can be a little too loud and resonant for some mics.
If you are using two microphones, the starting point for your recording should be the “X/Y Configuration” used by a lot of audio engineers. This means two microphones at 90 degrees to each other, pointing to opposite ends of the guitar. If you were to draw the same laser beams of light coming out of these two, they would form an “X” shape and cross over. The reason this is so popular is that it avoids issues with phasing, which can be something to come into play if you are using two mics pointed in the same direction.
Two microphones pointing directly at the guitar can be positive, and a Wide Spaced Pair’ technique can give a great atmospheric sound of the guitar. This may bring phase issues into the equation though, so this is something to be very wary of.
Other microphone setups are possible, and this can be somewhere to have a little fun. Some audio engineers swear by ‘over the shoulder’ microphones or other less orthodox ideas. Set up a couple of mics that you know are going to create a solid basis of your sound, and then a couple of others can be room for you to experiment. If you don’t end up using the audio, this isn’t the end of the world.
Tips for the actual recording process include:
- Do a lot of takes. There is no harm in having a lot of material, and it may be the case that you want to use sections from different performances.
- Monitor throughout and keep checking that the audio is coming through clearly.
- Check your interface and/or software regularly for clipping. This will come up as a red sign on your mixer and should be avoided.
- Play to a metronome. If you plan on adding other stuff afterward, a backing track or metronome is essential for keeping your timing.
Editing and Mixing
Once you have some recordings to work with, it is time to edit and mix the end result. Depending on how many microphones you’ve used, and how many takes you have, this can be quite a tricky task.
Remember that you can take sections from multiple recordings. If you like the chorus playing better from one of your recordings and the solo from a different one, you can chop them up to create one ‘perfect’ take. This is the done thing in the world of audio, so you shouldn’t really get any musical snobbery about it.
The tricks of using any sort of software can be learned online. There are a few different DAWS (digital audio workstations) that you may opt for, but taking a bit of time to read up on them or watch some tutorial videos will help. Some tools and plugins which will help you to clean up your guitar recordings include:
- EQ. Similar to the EQ you may have on a stereo, this means you can boost or reduce certain frequencies and make the guitar sound cleaner and more true to the original sound the instrument produces.
- Compression. A compressor will make playing sound more consistent. If you’ve strummed some parts more quietly, it will bring the volume up closer to the rest of your playing so there isn’t a variation for the listener as the track progresses.
- Reverb. Having taken it away, you probably want to put some reverb back. Luckily, plugins for reverb allow you loads of control over the ‘room’ you will be putting your guitar in virtually. Some even allow you to mimic the rooms of professional studios such as Abbey Road.
Be patient with your editing and mixing, and remember to save incrementally and regularly so you can go back if you’ve messed anything up!
Conclusion
Recording acoustic guitar is much like many other aspects of guitar or other audio engineering. There isn’t one specific ‘best’ way to do things. Instead, it is a case of coming up with a workflow which suits you and comes up with good results. Some experimenting and tweaking is inevitable as you learn how to record the instrument you are working with.
Generally speaking, following our tips first and foremost and learning the rules of getting a good, solid recording is key before you start to experiment and develop your own nuanced techniques. Start with good gear, use top techniques and ultimately your recordings should sound clean and professional.